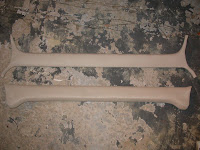
Once I got all the pieces made, cleaned and painted then started assembly. This had to be done in a specific order. First the clips needed to be glued to the rail. Then the rubber piece needed to be glued to the rail over the backs of the clips. I then had to replace the nine inches of missing rubber. I did this by using pink foam epoxied to the rail and sanded to shape. Then I upholstered the wood piece and the assembled metal/rubber/clips piece with headliner upholstery. Then I assembled the two upholstered pieces, using the clips to hold everything in place. They really look good and I'm very happy with the results. (Sorry I didn't take any pictures of the assembly process, but here are pictures of the finished pieces including the headliner and upper window frame pieces)


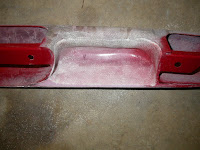
While working on this, I was also working on getting the two back deck pieces and two front window side frame pieces that are upholstered in the "wine" colored vinyl. This was pretty straight forward, using rubber cement to glue the vinyl. The front window side pieces required five separate steps to get everything glued down because of the multiple complex curves being covered. But I'm happy with the results. The big challenge with the back deck was the air flow vent in the center of the deck. This consisted of a metal framework with a metal mesh piece inside, and an upholstered wood cap on top. I had to clean, sand, rust encapsulate and paint all the metal pieces, and upholster the wood top piece. I picked a Rustolum flat enamel paint in a rattle can for the metal pieces. It looks pretty close the color of the vinyl, so that worked out well.


I also worked on reshaping the door handles so that they would be easier to upholster. I added pink foam and sanded to shape, then fiber glassed over them. I had some problem with an epoxy mix that did not set, so I had to redo one of the handles, but overall, I'm happy with the results. These will be much easier to cover and actually, I like the look better. So win-win!


While I was reshaping the door handles, I also worked on sanding and fitting the foam for the center console fascia. I knew that I was going to need to do some fitting after I got the center console upholstered, plus I changed my plans and decided to go with a single DIN radio on top with a cup holder below, instead of a 2 DIN radio. So I added some foam and sanded down the rest so that it will fit in the center console. Now I need to do the fiberglass/carbon fiber layup.

After getting the door handles shaped, it was time to upholster. I needed to cut and sew the upholstery for both door handles as well as one of the door pockets. I spent the better part of two evenings doing that and then half a day gluing the upholstery to the handles using rubber cement. They came out REALLY good, and I’m very happy with them. I also lined the insides of the pockets with headliner material so that things put into the pockets wouldn’t rattle.


Finally, I worked on getting the door upholstery done. I ended up with a challenge that I didn’t figure on when I created the door panels themselves; the depth and steepness of the door opener handle and the carbon fiber inset. I knew that I wasn’t going to be able to stretch the vinyl to fit into the holes, so I was planning on sewing an insert into them. However, this turned out to be much harder than I thought, partly because I’m not the most skilled upholstery person and also the difficulty in working with the fabric. I tried sewing in a piece into the door handle area and it looked horrible. So I came up with a brilliant plan to deal with the carbon fiber inset. I created a flat wood panel that the carbon will be glued to and that will then be screwed into brackets added to the back of the door panel. This way, the panel will stretch the vinyl into the hole enough so that I don’t have to deal with sewing.


The door opener handle will be a little more difficult. I was going to try to create a fiberglass/carbon inset that would fit over the vinyl, but that just was not turning out the way I wanted. So I decided to create a vinyl inset that will be glued to the door panel over which the vinyl for the door will sit. I will need to glue this vinyl to the vinyl inset, but that will look much more clean then trying to sew all the pieces together. I may have to make some more adjustments to get this just right, but I think I’m on the right path.

It's really nice to have so many pieces DONE and ready to go into the car. Things are moving forward and if I keep up the work through the winter, I may be able to make a running date for the Greenwood Auto Show this year. That's the plan anyway!
Next: Finish the upholstery for the doors and lay up the center console fascia. Then I need to start on getting the wiring sorted. After that, finish the dash including the wood and the lower fasciae that need to be shaped, fiber glassed and upholstered. After that, it’s a matter of getting the rest of the body work done and painted, then I can start putting things back together.
I do have two major purchases I have to get yet: Gas tanks and carpets. I also need to get all my chrome pieces in to be re-plated. But things are starting to move forward! Very exiting!
