Dateline - 04/23 and 04/24 2016 - Occasionally in this blog I go a little off topic and talk about other things going on in my life. This weekend I attempted real motor sport for the first time. I was offered an opportunity to be a driver for a team in a series called Lucky Dog Racing (
http://www.racelucky.com/). The cars are only supposed to have originally cost $2,500 and run on street legal tires or you get penalty points. Of course, after getting it race ready, it is significantly more!
The team I raced with was "Team Odin" who is championing a 1980 Rover P3500 SD1 (
https://en.wikipedia.org/wiki/Rover_SD1) with the aluminum block 3.5 liter V8. This engine has a long and storied history which you can read if you so desire (
https://en.wikipedia.org/wiki/Rover_V8_engine). Team Odin has been racing this car since 2011 and, well it's not as fast as a lot of the other cars out there. It's heavier than a lot of the cars, hasn't had huge amount of suspension or brake modes, and is a bit under powered. Not the kind of car you would think would be a road course car. But it is a race car all the same and a great test bed to learn how to drive competitively. Here are pictures:
 |
| Car on Sunday Morning |
 |
| Car on Sunday morning. Owner Chris standing behind |
 |
| Car on Sunday morning |
 |
| Car on Sunday morning |
 |
| The office |
 |
| One of the mascots |
 |
| You gotta have a horned helmet! |
 |
| "Nice Ass!" |
Well, the owner Chris was kind enough to invite me along on their team as a driver. I bought all the requisite safety gear (full race suit, helmet, shoes, gloves, etc.) and headed up to The Ridge (http://ridgemotorsportspark.com/) in Shelton Friday night to be ready to race on Saturday morning.
Saturday morning was cold and wet and we were all talking about how the car handles in the wet. Never having driven this car before and never seen the tack, I was a little concerned but confident. A little too confident. But more on that in a minute. The first 40 minutes of the morning was going to be qualifying. They wanted each of the drivers to take the car for three or four laps so they could get an average speed. Chris the owner took the car the first four laps and it was fine although I found out later he did get it a bit loose on one of the corners.
Then it was my turn! I got into the car and proceeded to do a pretty good first lap considering I was all over the course and had cars passing me! But as I started my second lap I lost the back end and slid backward into the curve on turn 1. The car started hard and I finally got it running and started up the climb on turn 2 and 3 and then the engine really started dogging, I made it to turn 8b before it started belching blue smoke and the car died.
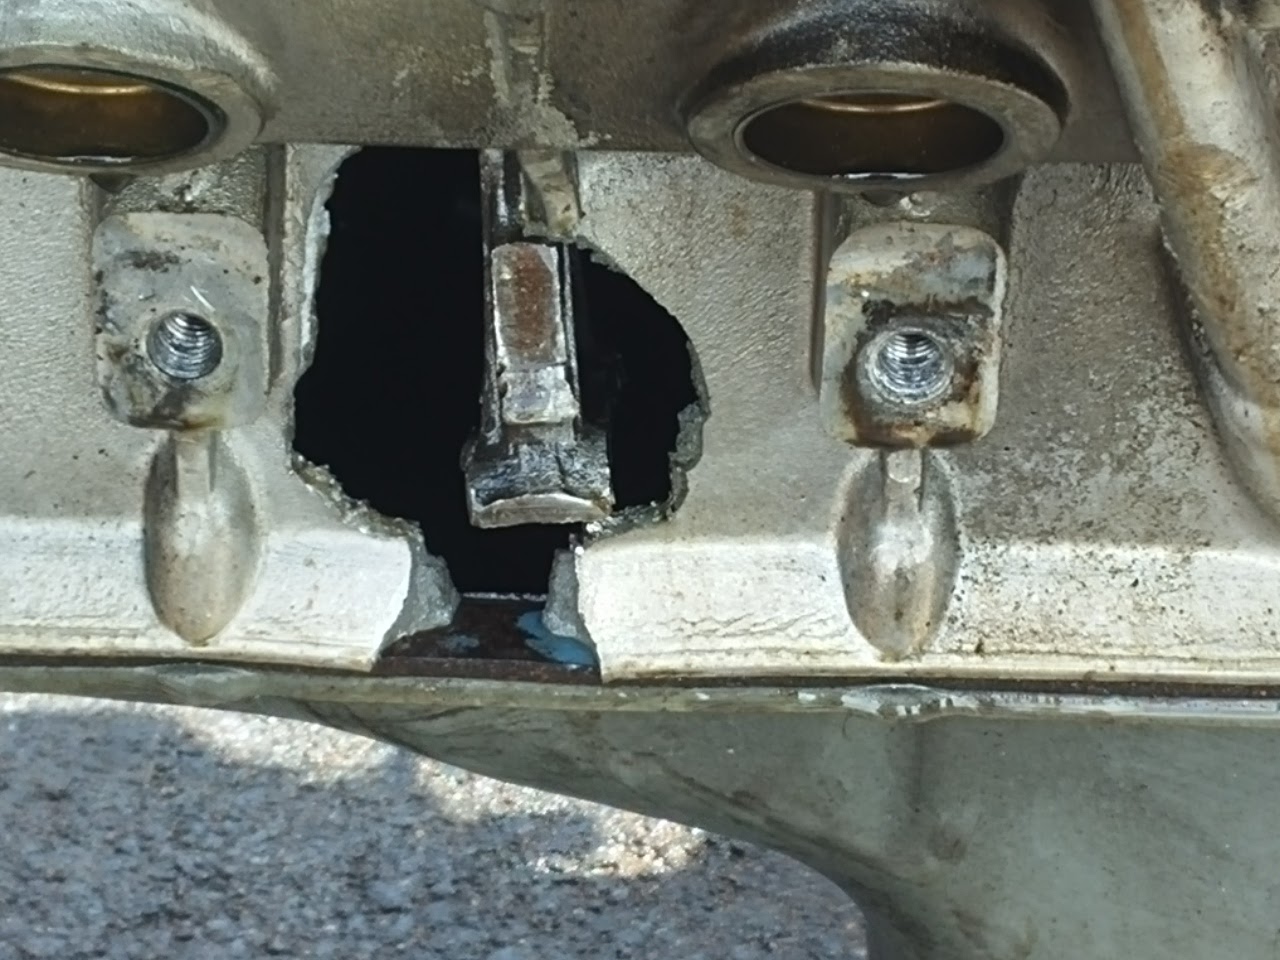
After many profane expletives (all caught on the Go-Pro!), I got a tow back to the paddock. We took the hood off and there was oil everywhere. Not a good sign. We could figure out at first why until we discovered the hole in the side of the engine below the #2 cylinder. Yup! I put a rod through the block! I SERIOUSLY BROKE THE CAR!
 |
| Hole in block partially hidden by motor mount |
 |
| Motor mount removed, much better view of hole |
 |
| "I don't think that rod is supposed to be there! |
Now at this point I have to thank the magnanimity of the car owner and the rest of the team! I was devastated! Not only had I broke the car, but I ruined the chances of the team racing on Saturday and possibly the whole weekend! We all spend a lot of money to get into this race, plus time, energy and expectation. NEVER ONCE, and I mean this, did the team ever blame me for the engine! In fact, they were more then generous with me in giving me their experiences with the car and incidents they have had with breakdowns. And the statement, "This is racing" was said to me probably more then 100 times! I still felt (and feel) horrible about taking out the car. But that appears to be my burden to let go of!
So, what to do next. Well, we had an extra engine in the support truck, so it was time to change it out. At least I had a chance to redeem myself by putting all my efforts into this! We proceeded to pull the old engine out, leaving the transmission in the car. Of course, an engine pull is a lot of work and something nice to do in a shop with heat and a lift, not under a tent with rain and wind! But we prevailed and got the old engine out, which made quite a conversation piece, and the new one in. We were buttoned back up and ready to go around 8:00 pm. Just in time have a few beers.
The other thing I have to say about the team is that they are VERY creative! We had a few issues with the engine swap. First, the engine that was in the car was an America version from the 1960's. We were putting back the 1980 Rover version which had a few distinct differences. It has a different oil pump interface so we could not use the Accel electric ignition/distributor from the old one, which means we lost the rev limiter. The old engine used studs for the exhaust manifolds while the Rover used bolts (run to the hardware store!) Also, we forgot to bring the clutch spline alignment tool, which is pretty critical. The good news was that the car now had a Ford T4 transmission, so we went to one of the Mustang teams racing that day and they had the correct alignment tool.
But the real creative solution for the day was the transmission shaft pilot bearing. The one in the old engine was designed to fit the American crankshaft and the T4 transmission. The one in the Rover engine was smaller in both outside and inside diameters. We tried to drill out the bearing, but ended up breaking it. No parts store in Shelton carried a bearing for a 1980 Rover, so we got creative. We went to the local Ace Hardware and found a brass pipe fitting that had the correct inside dimensions with a small smooth area for the race, and larger outside area with threads. We put the fitting into a drill bit wrapped with electrical tape, mounted the drill on a vice and using a flat file, filed the outside down until we were able to hammer it into the crank! That was some real thinking on the fly!
So, what were the results of our labor? We got a full day of racing in on Sunday. We had to come in twice because a rubber water plug broke, twice! Easy fix and no damage to the engine.
Here are some pictures of me racing:
 |
| Fueling before my time |
 |
| Strapped in and putting in steering wheel |
 |
| Just exiting turn 13 into 14 |
 |
| Heading into 14 |
 |
| Heading into 14 |
 |
| Hitting apex at 14 |
 |
| At apex on 14 |
 |
| Exiting 14 |
My experience? Racing is really hard! You are trying to learn a track, how a car handles and deal with a bunch of much faster cars passing all the time. To be honest, after 30 minutes I was exhausted and noticed that I was loosing concentration so I came in. I didn't want to break the car again and felt that caution was better suited for the day. I did get a chance to run again one last time and felt much more comfortable even though the car was pretty rough running. I still babied it, and felt good that I made it through the race.
Will I race again? Yes. I don't think I'm a natural race driver, but I want to get some more experience doing this. I think I can like it if I can get past the, "don't break the car" feeling. But even if I don't race again, I'm glad I got the chance to try it at least once!