Tuesday, January 26, 2016

Finished Trunk - Mostly

Dateline - 1/23/2016 – Continued to work on the truck on Saturday.  I needed to tie up loose hoses and get the wiring settled out.  I installed waterproof connectors on all the wiring for the taillights and side markers and was planning on installing them, but when looking through my box of parts, I realized that I had ordered the gaskets that go between the lens and the light frame, but not between the frame and the car!  Do’h!  So I ordered the parts via SNG Barratt and hopefully they will be here soon.

Also, I installed the boot lid seal and hinges and generally cleaned up the trunk.  At some point in the future, I’m going to install upholstery panels and such, but that is a task for another time. Right now, I’m happy to have all the wiring done and ready to go.  


Here are some pictures.  It's come a long way since this: http://leapingv8s.blogspot.com/2009/10/down-for-winter.html
trunk from back looking forward

View from passenger side
View from driver side

Top view of fuel control system (top is forward)

Vapor recovery system.  Not how tubing runs up the driver side C pillar.

Monday, January 18, 2016

Started On The Trunk

Dateline – 1/16/2016 – Finished up under the hood and started work on the trunk this weekend.  I had a few odds and ends to do under the hood, like putting on some hose clamps, finalizing some hose and wire routing and hooking up the water control valve for the heater.  

If you go back to Jan 14, 2014 (Wow!  Two years ago!) http://leapingv8s.blogspot.com/2013/01/starting-work-1-item-at-time.html  you will see that I created a system that uses a Chevy Astro vent door actuator to activate the heater water control valve mounted in the engine bay.  That actuator is not heat resistant so it needed to be mounted in the inside of the car, so I mounted it on the brackets I build to hold up the right side dash board and the new fuse blocks.  The activation cable runs a straight shot through the firewall right to the water heater value. 

Except for the exhaust manifolds, and a few things I need to do once I have the hood installed, I’m think I’m done with the engine bay!  Yes!!!

I also started working on the trunk.  First, I had to paint the area around the back on the trunk that was still in primer.  After getting that painted, I installed the fuel tank manifold system.  If we go back to October 28, 2013, http://leapingv8s.blogspot.com/2013/10/welcome-to-20132014-project-car-season.html you can see the tank delivery system I devised.  I took all of this out when I got the car painted, so I reinstalled it this weekend.

I also needed to put in the interior air circulation box.  Every car has places that allow the air inside the car to exit out so that you do not build up pressure inside.  On my car, the exit points are in the rear trunk lid crease.  The air travels through a vent in the top of the rear deck (seen here http://leapingv8s.blogspot.com/2011/12/great-movement-forward.html), into a box about 1 1/2 inches deep under the deck.  This box was really rusty so I cleaned it up and fiber glassed it (http://leapingv8s.blogspot.com/2013/03/odds-and-ends-and-odds.html).  In October, I mounted the four, one-way doors using Kevlar fabric (the original was rubber impregnated silk).  Here are pictures of the finished item out of the car:

Air circulation box outside of car, clean and painted.

One way doors as seen from car side of box.

One way doors as seen from trunk side of box.

To mount it in the trunk, I needed to put a seal around the mating surfaces and then carefully bolt it back in.  I created the seal using Eastwood Flexible Strip Caulk (http://www.eastwood.com/ew-flexible-strip-caulk-bk-2-lbs.html) because I knew it would make a good seal and would conform to the surfaces.  After getting the box installed, I ran tubing from the vents (the things that plugged up and caused the box to rust in the first place) through the trunk and out a hole to the rear wheel well.

Next I needed to put in the fuel vapor control system.  This system is very interesting.  There are two vents on each gas tank.  One is at the top of the tank, the other runs from the filler nozzle.  The one on the tank allows air to enter the tank and keep it from developing a suction.  The one on the filler is used to catch any gas vapor the exits the tank.  These two vents connect, via tubing to a manifold that sits against the back window base and then runs up the left side C pillar, then back down to the trunk where it exits into a tube that runs to the engine bay.  The manifold is designed so that if any liquid gas gets caught in the lines, it will drain back into the tanks, ensuring that the line stays free for vapor to flow through.

Over the summer, I had sandblasted and painted the pipes.  Now I had to reinstall then.  It was a bit tricky because I had done a lot of work on the back deck, so I needed to drill some holes to allow the pipe to go through.

That was as far as I got on Saturday.  I don’t have much left to do in the trunk at this point:

  • Wire up the fuel control solenoids
  • Install the tail lights and wire them
  • Plug in the fuel gauge senders
  • Install the truck fuse block (I added this so that I can put in electronics in the back if I want)
  • Install the tail lights
  • Clean up the loose wiring.
  • Install the trunk hinges


Monday, January 11, 2016

Engine Bay Odds and Ends

Dateline 01/09/2016 – Did lots of engine bay odds and ends this weekend.  The day started with installation of the fan control unit.  I did opt to purchase a thermostatically controlled unit from the same company that made the fan.  I mounted it on the firewall where I had the relay before.  It requires a probe be pushed into the fins of the radiator, on the other side of the car!  So it took a little finagling to find a place that was close to the battery and still had enough length to reach the correct spot on the radiator.   Here is the installation of the probe:

Temperature probe (brass cylinder just to the left of fan shroud) installed on hot side of radiator
To wire in the controller, I had to mount a 30 amp circuit breaker (which I put beside the battery) along with wiring from the battery controller.  I also had to run a hot from ignition and an override wire back into the car.  This required making up some more wiring harnesses and since I was in the same place as the windshield washer reservoir, I went ahead and wired that up too.

The original instructions had the fan leads being spliced directly to the controller, but I didn’t like this idea because I would have to cut off the splices if I ever needed to remove the radiator.  So I use a three prong waterproof connector that I purchased many years ago to give me easy disconnection.

The final effort in wiring was finishing off the wiring around the battery cutoff relay. I needed to purchase a battery cable that would go from the relay to the firewall pass-through stud, which I got from Amazon.   The rest was wire wrapping and clean-up. 

So, all I have left for wiring in the engine bay is connecting the distributor and the fan controller to ignition hot, which will happen inside the car.  Honestly, I’m glad to be done with wiring for a while!

My next project was fitting the radiator.  One of the things I didn’t like about the prior installation was the transmission cooling lines.  They were in pretty bad shape, looking like they have been used for a couple of different engine installations.  So I purchased some steel tubing, a double 
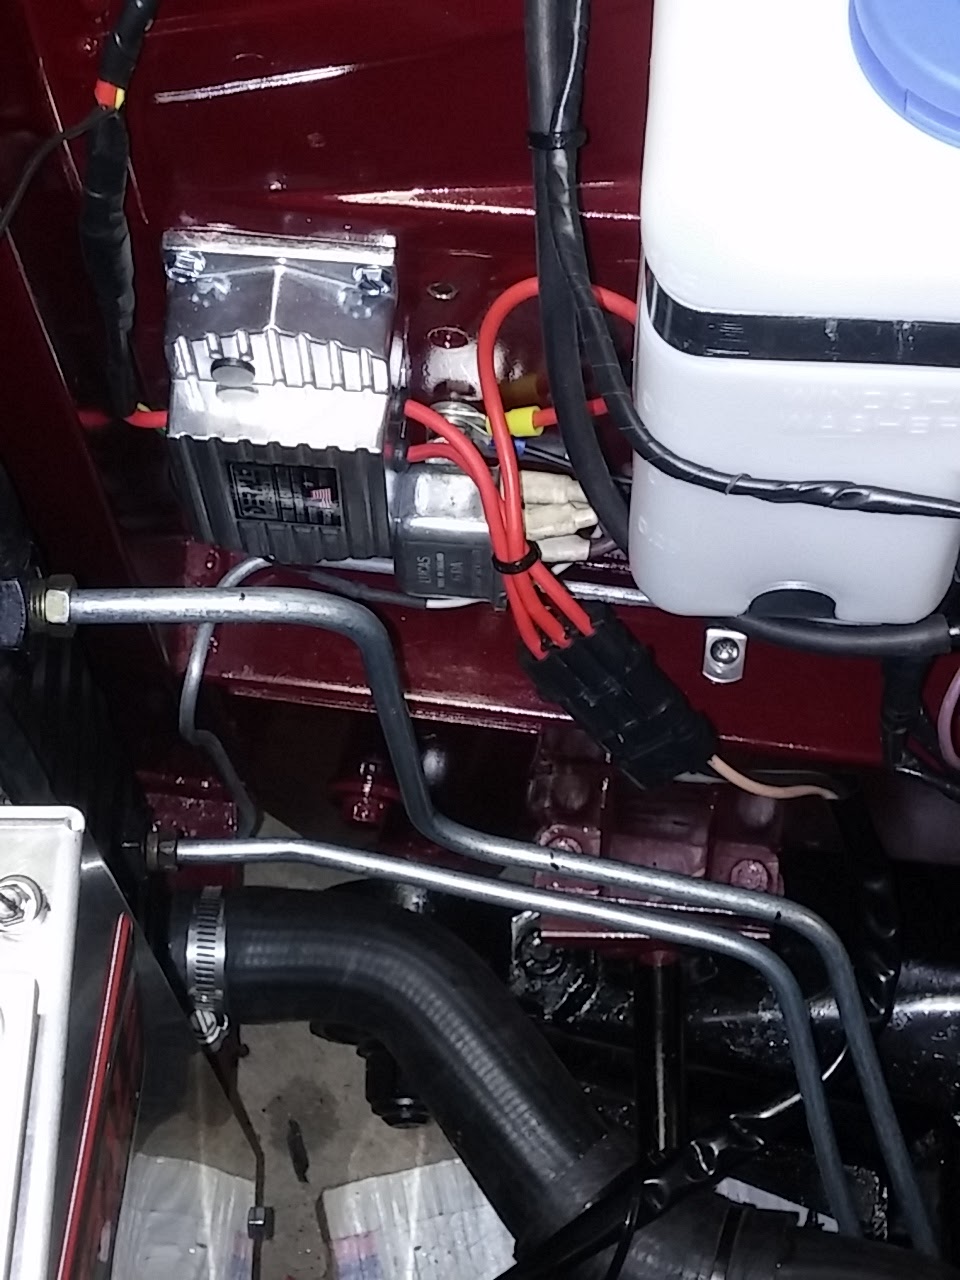
flare kit and a tubing bender and went to town.  Here is a picture showing the tubing, the fan controller, the horn relay, and the windshield washer bottle.
Fan Controller and new radiator cooling tubing  Note plug connecting wires from controller to fan

Once I got the tubing bent, installation of the radiator was easy.  Just needed to screw in the top bracket and it was done! 

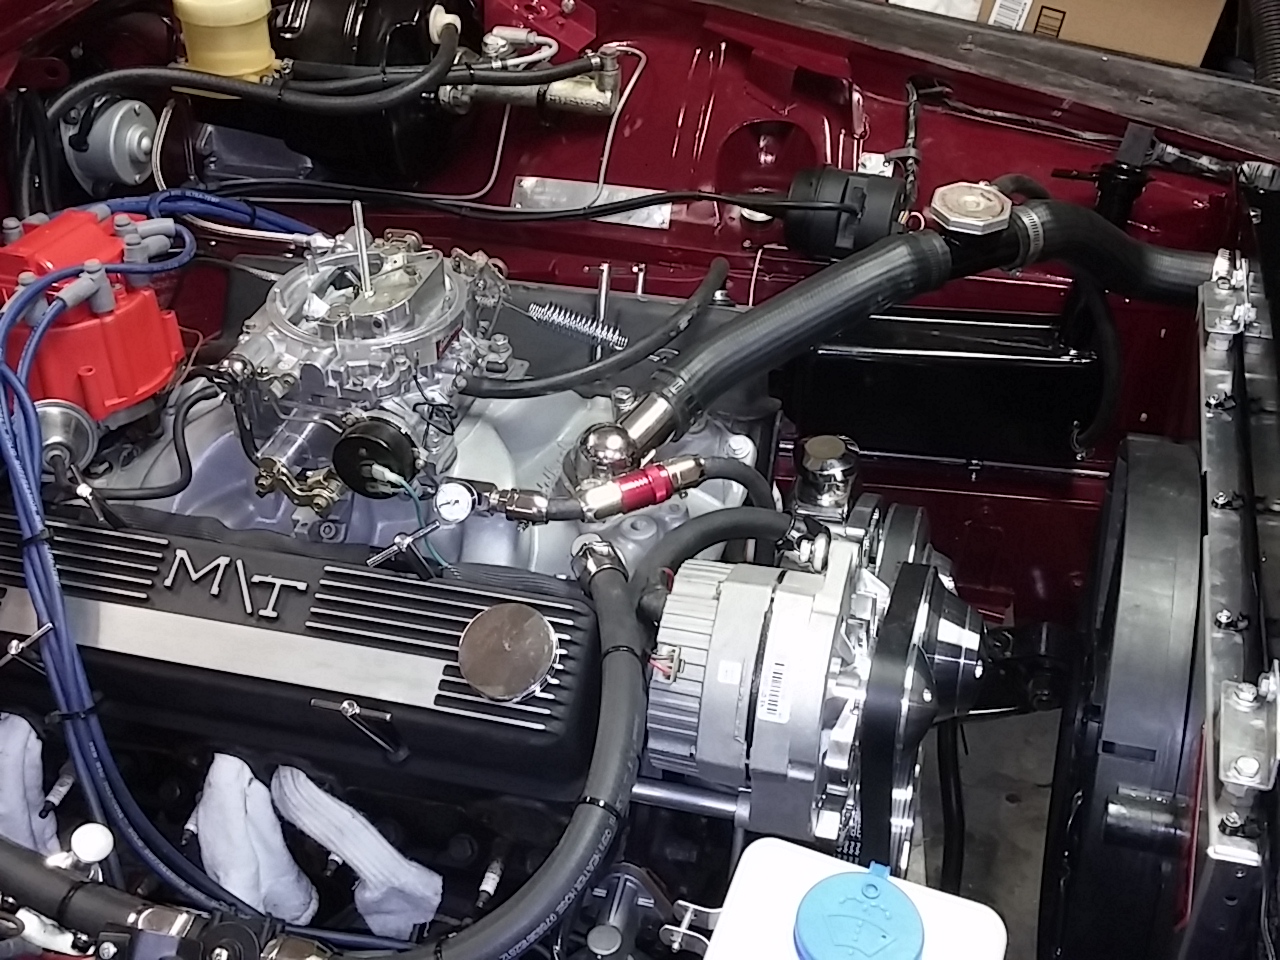
My last task of the day was to install the thermostat housing and radiator hoses.  I bought new stainless steel bolts to hold in the housing, so it was an easy matter of installing it.  I put the radiator hoses on, but I need to get a few hose clamps.  I also installed the radiator overflow from the filler cap to the overflow tank.  I do need to get some more radiator overflow hose to go from the overflow tank to the ground.


Thermostat housing, upper radiator hose and overflow hose to overflow tank.
So, what’s left?   Well outside of the elephant in the room, the exhaust headers, not much.  I have a little more strapping and tidying to do, a few holes to plug and some wiring to complete inside the car, but honestly, the engine bay is done!

Next week, I start the trunk!

Monday, January 4, 2016

Welcome 2016!

Dateline – 01/02/2016 – Did a lot of fabrication in the engine bay this weekend.  Fabrication always takes a long time and it never feels like I get a lot done after an eight hour day, but the reality is that I do.  So what did I fabricate?  A bracket to keep the heater hoses from resting against the battery.  A bracket to move the transmission fluid filler/dip stick away from the wheel well to clear the heater hoses and a bracket to hold the new, generic fit, windshield washer tank/pump.  All required, templates, cutting, drilling, filing, sandblasting and painting.  Like I said, a lot of work, but well worth the effort.

Bracket to keep heater hoses away from battery (hard to see but its there!)
Bracket to move transmission oil filler/dipstick way from wheel wheel to clear heater hoses
I got most of the windshield washer installed but it was getting late so I wasn’t able to finish the wiring.
Windshield washer tank and pump installation
I also installed a new battery ground cable and put rubber hoods over both the battery ground and positive cable to clean them up. 

I finally tore apart the old voltage regulator wire harness and realized that none of the wires are used at all, so pulled the regulator off and attached the harness to the wheel well for safe keeping.
Voltage regulator wire harness bundled out of the way.
I also finished the electric cooling fan installation.  It required another run to the hardware store for longer bolts and a bit more drilling.

Last but not least, I installed all the vacuum hoses inside the engine bay.  I’m using the original A/C Overflow tank that is installed in the left wing as a reserve vacuum tank which is recommended with the vacuum actuated cruise control.  The vacuum out port on the manifold has two pipe fittings.  I used one for the vacuum advance on the distributor, the other for the vacuum to the cruise control and to actuate the vacuum motors that control airflow in the car.  The car originally had a vacuum motor controlling the vent/re-circulation gate, so there was already a port in the firewall to allow the vacuum hose to pass through, so that was pretty easy routing.

So, what is left?  Not much actually!
  • Finish wiring in the windshield washer motor
  • Finish wiring in the battery cutoff relay and bundle up the wiring harness
  • Finish wiring in the electric cooling fan.  I think I’m going to get a temperature activated fan controller so that the fan only come on when the radiator gets to a set temperature.  That will probably get rid of the relay I have mounted now.
  • Wire in the Distributor to “hot from ignition.”  I need to find a wire inside the car for that.
  • Final wire harness bundling, holes in firewall filled and cleanup.
  • Exhaust manifolds.