Tuesday, May 25, 2010

More On The Car Then Off

Dateline – May 22 – Wow! I really feel like I’m making some headway. I wanted to get the entire interior and trunk painted this weekend as well as start to work on hanging doors so that I can work on the actual exterior body work (This has been a long time in coming!). I needed to finish some welding on the left had rear fender and, of course I ran out of welding wire five small holes from being done!

After completing the welding, I filled all the seams in the inside and trunk with Eastwood Seam Caulk, let it set up then primed the interior and truck.

I needed to let that dry, so I took a little trip over to O.O. Deny Park in Kirkland to view some Citroens that were gathering there for a small weekend outing. I know! A British car guy going to look at French cars! But really, I’m just a car guy! Got a chance to ride in a DS! OMG, the Brits really don’t have anything on this car unless it’s a Rolls! What a ride! I also got a comparison ride in a 2CV. Yes, very different, but some the same. Kind of makes me want to venture into new fields…HOLD ON! I need to get what I got running first!

So back to the garage and the paint can! Painted the entire interior and most of the trunk, until I ran out of paint. Very happy with the results and feel like I’m really moving forward.


To prep for doing the exterior body work, I need to re-hang the door, but I wanted to take all the insides, glass and chrome off first that way I can get a good re-spray, as well as kill any rust inside the doors (thankfully, very little!). However, I have never taken the glass out of these doors before and found out that there are some tricks! It took about three hours to get the right hand front and back doors stripped completely. But they are done and painted with rust encapsulater. So I’m ready to hang them. And now that I know how to do this, the left hand side will be much easier!

An interesting note: The power window motors are AC Delco parts! I’m glad they are not Lucas!


I pulled out the truck lid, which I had stored away since I took it off in October and realized just how much rust was inside this thing! I removed all the shinny bits and started scrubbing out the inside. I need to remove some of the adhesive used to hold the sound deadening padding (which was good at holding condensation and rusting the metal) before I can paint with rust encapsulater. Since a good portion of the trunk lid will be visible, I’m going to paint it with the exterior color and clear coat it. It will look really nice.

Finally, I put the trunk lid on the car and just to see how much work I need to do to the body and found that it fits pretty well. I did a good job at getting the right corner of the body the correct shape, which is good. I’ll need to do some filler work, but I expected that. The biggest problem is around the left rear where the car had been rear-ended. There was a lot of filler in this area before and I really don’t want to fill it back, so I think I’m going to concentrate on getting the metal back out to the correct shape. There is also a problem around the top right back corner that will require some serious hammer work. But I knew I had work to do there.

So, I’ve got a gallon of Evencoat Rage Gold on order from Eastwood that I hope to have by the weekend! I’m looking forward to doing the body work. It’s been a long road here, but it finally feels like I’m really moving forward!

Front Window Frame, Battery Box, Rear Right Fender, Trunk and Back Seat Tub Welding

Dateline – April 15 - I decided to take care of most of the remaining body issues this weekend by welding up areas around the front right window frame, back right fender, holes in the trunk and back seat tub area. The window frame just required some spot welding to fill small holes that appeared. The back fender required spot welding as well as a metal patch around the back of the wheel arch. This hole was just too big to fill by hand.


I also took time to weld in a metal panel over the hole in the front scuttle that usually holds the battery box. This is a hole that is left in the body for the right had drive cars so that the brake and gas peddle assemble can be installed. For the left hand drive, a battery box is bolted in place. My battery box is gone and I plan to replace it with a chromed version. So I decided to just weld in a new piece of metal to cover the hole and give me a good foundation for the new box.


I had a couple of holes in the truck that required filling. The trunk saw a lot of sitting water and really needed some care. So I fabricated five metal pieces, welded them in, sealed them (and the whole trunk) with Eastwood Seam Caulk, primed and painted.


The back seat tub had some areas of rust, plus some holes had been drilled to mount the non-Jaguar rear seats. I made little metal plates that I welded into place, sealed and painted.

Finally, I painted the inside of the right fender well and gas tank cavity with rust encapsulating paint. Since a lot of rust happens around where the inner wheel well and fender are welded together, I took a turkey baster and “basted” this area with the paint. The interesting thing was that I found a couple of other rust holes were the paint came poring out of unexpected areas! I had a little more welding to do!

Rebuilding the Bad Area (con't)

Dateline – May 1 – 12 (con't) Here is a picture of the back deck prepped for replacement. I painted everything beforehand because I knew that once I welded in all the rest of the panels, I would have a hard time getting into this area.


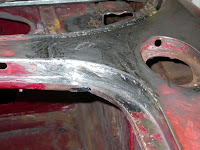
After welding in the bottom and back deck pieces and the bottom of the window frame I then concentrated on replacing the sheet metal around the back C pillar that had rotted away. I don’t have pictures of the before, but here is the after. Note that I have sealed all the seams with Eastwood seam caulk, primed and painted.


Rebuilding the Bad Area

Dateline – May 1 – 12 – One of the worst surprises on this car was the condition of the back right scuttle just inboard of the right gas filler. I’ve posted before about the condition before Well, now it is the time to attack the problem.

First, I had to create the sheet metal replacements. This required creating paper templates, cutting, bending and fitting eight pieces of 18 gauge sheet metal. This took a lot of patience and a lot of time! This is also where the Shrinker/Stretcher came into real play. I was able to create the pieces that would become the new rear window frame, and the back trunk edge with these tools. Pretty fun to use too!


After I got the pieces fabricated, I started the assembly process by prepping the exiting body. There were some holes that needed to be welded closed first, so I took care of that. Then I started assembly. I’ll let the pictures speak for themselves:


You will notice in the following pictures that the upper window frame is in and I built up a fillet to match the shape of the body. Again, not the best welding, but this will be covered in a thin coat of body filler, so it will look fine when done.

New Floorboards

Dateline - Apr 17 – 24 – Well, I bought all the tools I needed to do the sheet metal work, including a Mig welder, shrinker/stretcher set, small metal brake, new angle grinder disks and a bunch of hacksaw blades.

In prior posts, I showed the metal that I had cut out of the car to get rid of the rust. Now I’m going to put metal back in, starting at the floor boards. I picked up some 18 and 20 gauge steel at a local metal wholesaler and started making the floorboards. I needed to replace part of the bottom floorboard as well as the kick panel. I decided to fabricate these out of flat steel instead of trying to get the complicated rolled texture. However, I was worried about the strength, so I put a “Z” bend into the floorboard replacement where it meets the old floorboard. This gave me a good surface to weld to and gave the metal a great deal of strength. The kick panel is just a flat piece, cut and bent to fit into place. Since this will not get the abuse that the floorboard will get, I was not as worried about reinforcement here.

After fitting and bending, I primed and painted all surfaces that are going to be welded together to prevent rust. I knew that I would cook off some of the paint in the welding processes, but I can reach these places and will paint over them later.


Now, I have to admit that my welding was pretty bad! I think my 8th grade shop teacher, Mr. Plummer, would only give me a C- for the work! But it is welded together and since this really isn’t structural, I’m not terribly worried about it. It did take a lot of work with the angle grinder though to get it into any kind of presentable view.

After all the welding was done, I filled all the seams with Eastwood seam caulk, primed and painted. Here are the results!